In this tutorial we are going to show you the first steps you need to take just after installing PrestaShop 1.7. There is a video version of this tutorial on our YouTube channel that we strongly recommend you to watch so you'll make sure you don't miss anything.
Video guide:
First Steps
- Deactivate your shop
- Delete the demo data
- Configure your shop’s information
- Customize the design
- Customize the content
- Employees information
- Configure payment methods
- Configure carriers and shipment
- Activate your shop
Let's cover these topics in a little more detail in this tutorial. We will later go into the deeper details of each one in a separate tutorials, one by one.
1. Deactivate your shop ^
After installing PrestaShop you need to make sure no one can access your shop while you are busy making changes, creating products, settings prices, etc... This is called "putting your shop in maintenance mode". This also prevents search engines like google from indexing the demo data.
To do this, in your back office, go to the "Shop Parameters > General" page.
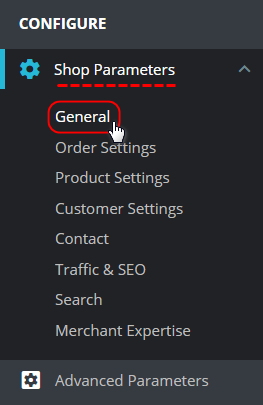
Image 1 - General tab
Maintenance options are on the second tab:

Image 2 - Maintenance tab
- Set "Enable Shop" to no.
- Click on "Add my IP" so you can visit front office with this IP.
- Finally save it.
You can add multiple IPs, so your shop will be visible to those IPs as well
2. Delete the demo data ^
If you have set "Install Demo Data" to "Yes" in the installation process, you need to delete these demo data or modify them to your needs. They are only here to help you understand the structure and look of a PrestaShop store.
To start your shop, you need to delete them all. These are catalog data like products, categories, brands, Orders, Customers. Also, carriers, contact, stores, and static pages. Most of them can be cleaned using the "Database Cleaner" module. This a free module which we will cover in next tutorial. Other data like contact and static pages can be deleted or modified from their respective pages in PrestaShop preferences.

Image 3 - Demo data
3. Configure your shop’s information ^
You need to set your shop name, logo, address, and email. Your shop's default currency, social network pages. You also need to write the privacy policy, terms, and conditions of use, about us, shipping, and payment details of your shop. This is also done using some modules and preferences of PrestaShop, which we will cover later in separate tutorials.
4. Customize the design ^
Customizing the design means the look of the header, footer, home page, category pages, product pages, and so on. We are going to achieve this via modules and preferences.
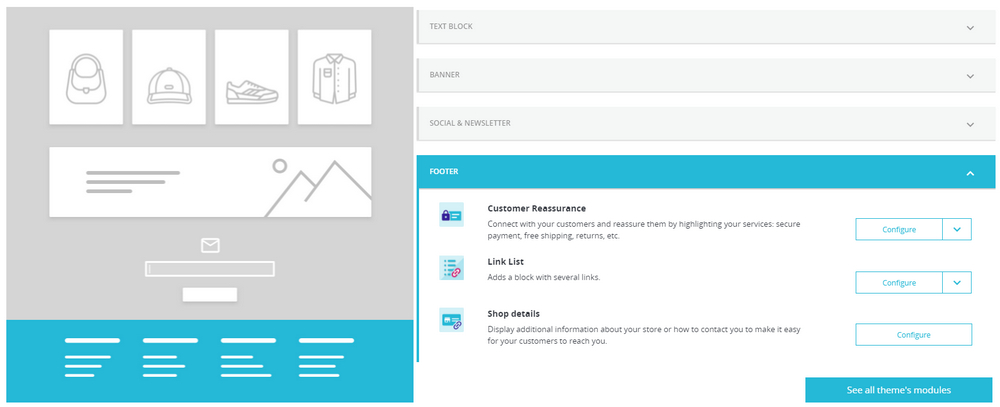
Image 4 - Customize the design
5. Customize the content ^
Content of the shop refers to the catalog that is to say categories, products, and brands. The top menu, image slider, banner, and text block. These need to be customized to your taste and needs. These are for the default theme of PrestaShop 1.7. If you have a premium theme, like Panda and Transformer, you have much more options to configure.
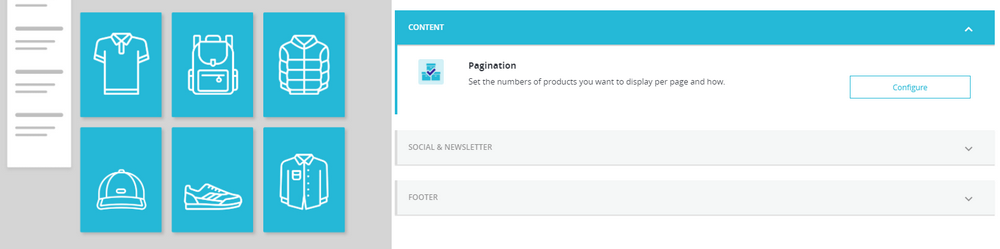
Image 5 - Customize the content
6. Employees information ^
After you set all these information and preferences, if you have employees, partners, or simply your family helping you, you need to create a personal account for them to access the back office of the shop. This is needed to know who has done any actions and also giving them specific access rights based on their job descriptions and hierarchy.

Image 6 - Employees information
7. Configure payment methods ^
Configuring the payment method is an obvious step. Your shop is meant to earn money and accept payments from customers. There are 2 default modules already installed on a fresh Prestashop, Payment by Check and Payment by Bank Wire. There are plenty of other payment modules like PayPal, Stripe, and so on. You could find them on PrestaShop Addons marketplace. Most of them are free.

Image 7 - Addons modules
You can also restrict currencies, customer groups, countries, and carriers from accessing each payment method via the Payment > Preferences menu.

Image 8 - Payment restrictions
8. Configure carriers and shipment ^
When orders are placed, you need to ship the goods to the customers. So you need to configure some carriers based on Zones, countries, and states. Based on the size and weight and also customer groups. We will configure these from Shipping > Carriers and International > Locations Menus.
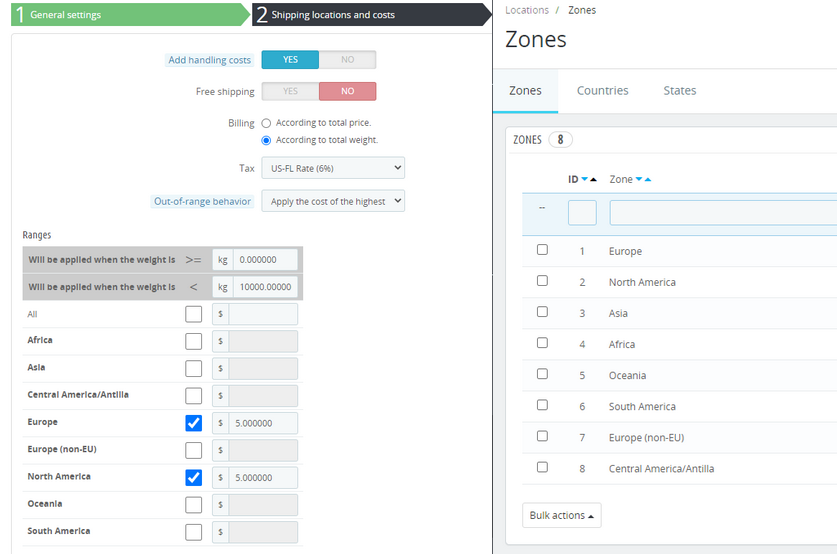
Image 9 - Carriers and shipment
9. Activate your shop ^
When everything is set and done, you can finally activate your shop and open it to the public. When you shop is in maintenance mode, you can reach that page by clicking the icon shown in following screenshot (top right corner of the page) or you can go to the "Shop Parameters > General > Maintenance" tab.
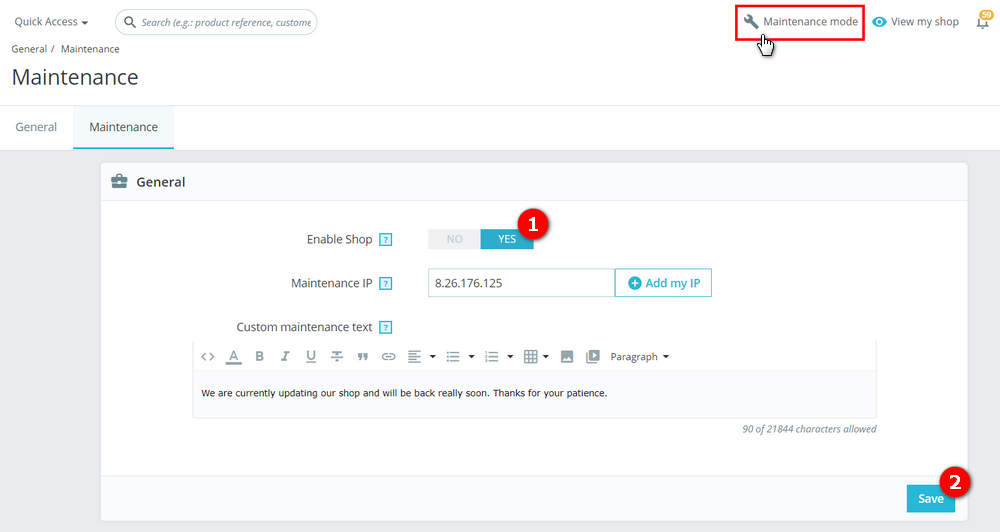
Image 10 - Activate your shop
- Set "Enable Shop" to "Yes".
- Save it.
These are the first steps you need to take and I am going to walk you through each one of them in separate tutorials one by one. Go ahead and read them in the order you like.


